


Create Application user for Dynamics CRM 365
16. Juli 2021
Querying Dynamics 365 databases directly with SQL
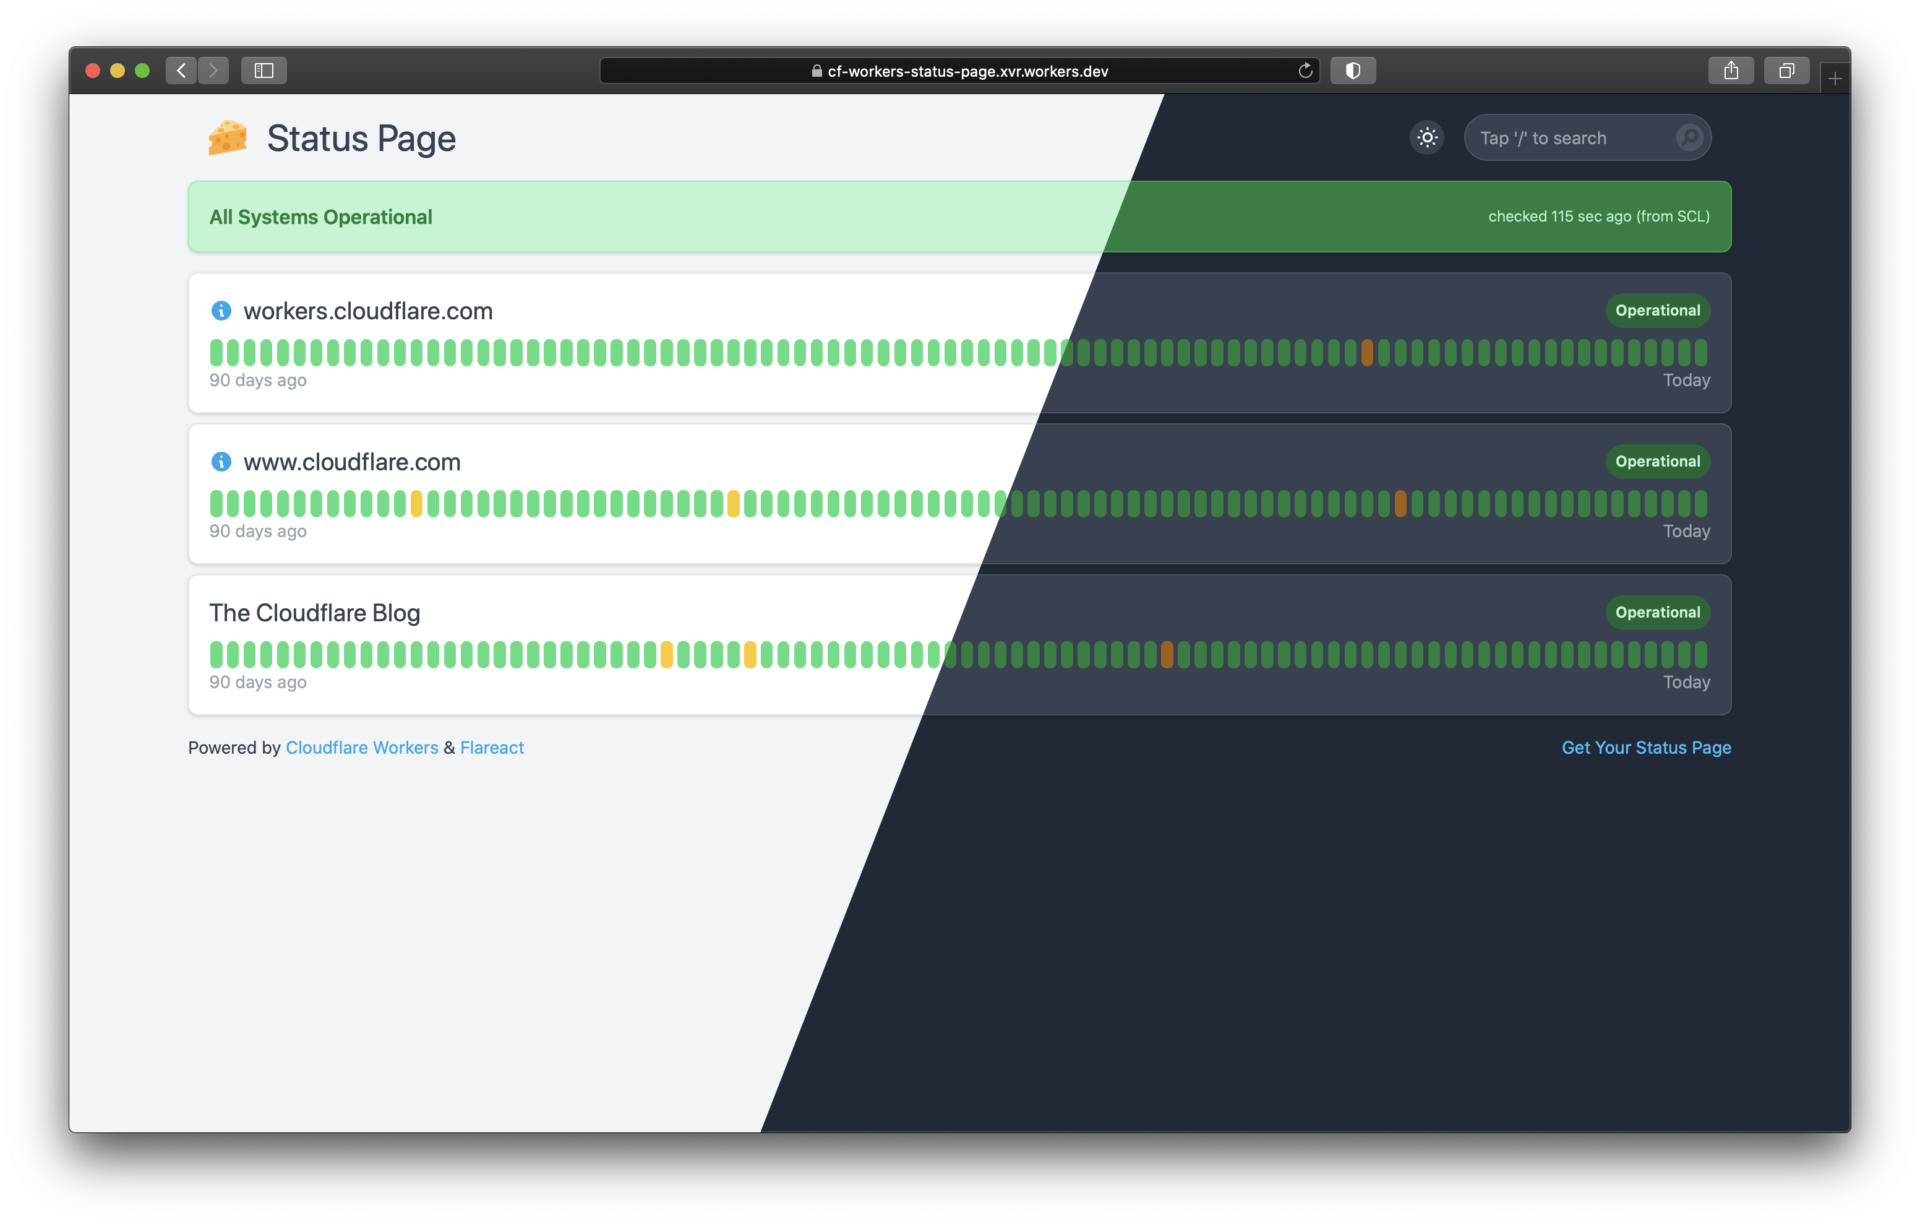
8. September 2021Having a status page for your services is certainly a very good idea to keep your users informed about any incidents or downtimes that may happen. I like to use Cloudflare Workers for my status pages, because:
- They are free
- They scale indefinitely
- Besides deploying & configuring, there are no maintenance tasks
Fortunately, coding isn’t required either, because there’s THIS great OSS status page which comes with everything you need, including Slack and Telegram notifications.
Prerequisites
Before we begin, make sure you have everything at hand:
- a Cloudflare account with your domain already configured (works fine on the free tier)
- an Azure DevOps account with a Linux agent available (deploying won’t work on Windows, even if it should – trust me, don’t waste your time on this)
- The GitHub Repository (https://github.com/eidam/cf-workers-status-page) already imported into a DevOps repository
Setup Cloudflare
The status page uses the Cloudflare Workers KV Store to persist the monitoring history. The only thing we’ll have to do is to create a namespace named KV_STATUS_PAGE.

Because we want a nice url for your status page, we have to assign a route and create a CNAME record.
We navigate back to the Workers menu item in the main Cloudflare portal and add our desired route like in the screenshot below (don’t forget the /* suffix). We don’t have to select a worker right now.

Next, we add a CNAME record in the DNS management for our site. The CNAME doesn’t have to point anywhere meaningful, it just has to be proxied trough Cloudflare so the Worker can kick in an show us our status page.

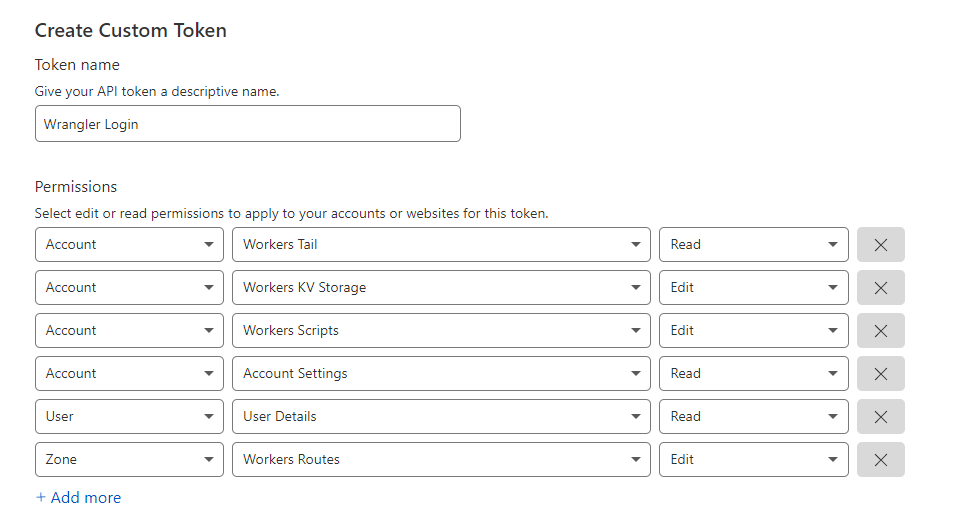
Get an API Token
For deployment in our Release Pipeline we need a Cloudflare API token with the following permissions:
Configuring your Status Page
To customize the visuals of our status page and what it should monitor we’ll have to edit the config.yaml in the root directory of the repo. This is pretty straight forward and documented in the readme.
settings:
  title: 'Status Page'
  url: 'https://status-page.eidam.dev' # used for Slack messages
  logo: logo-192x192.png # image in ./public/ folder
  daysInHistogram: 90 # number of days you want to display in histogram
  collectResponseTimes: true # collects avg response times from CRON locations

  allmonitorsOperational: 'All Systems Operational'
  notAllmonitorsOperational: 'Not All Systems Operational'
  monitorLabelOperational: 'Operational'
  monitorLabelNotOperational: 'Not Operational'
  monitorLabelNoData: 'No data'
  dayInHistogramNoData: 'No data'
  dayInHistogramOperational: 'All good'
  dayInHistogramNotOperational: ' incident(s)' # xx incident(s) recorded

monitors:
  - id: workers-cloudflare-com # unique identifier
    name: workers.cloudflare.com
    description: 'You write code. They handle the rest.' # default=empty
    url: 'https://workers.cloudflare.com/' # URL to fetch
    method: GET # default=GET
    expectStatus: 200 # operational status, default=200
    followRedirect: false # should fetch follow redirects, default=false
    linkable: false # allows the title to be a link, default=true

  - id: www-cloudflare-com
    name: www.cloudflare.com
    description: 'Built for anything connected to the Internet.'
    url: 'https://www.cloudflare.com'
    method: GET
    expectStatus: 200
    linkable: true # allows the title to be a link, default=true

  - id: blog-cloudflare-com
    name: The Cloudflare Blog
    url: 'https://blog.cloudflare.com/'
    method: GET
    expectStatus: 200
All Cloudflare specific settings go into the wrangler.toml file. We need to change the following settings:
- name: We can chose any name for our status page
- account_id: Our Cloudflare account id (this is a GUID, not your account email)
- workers_dev: false (In theory, this should just define if the workers.dev route should be active in addition to your own route, but it was problematic in my deployments, so I turned it off)
- [env.production].kv-namespaces: the binding name is hard coded, insert the KV id from earlier. We can also specify a preview_id, this prevents changing anything on the production KV while running locally. We can also insert the production KV id here.
- [env.production].zone_id: Our Cloudflare zone id
- [env.production].route: The route we specified earlier
name = "demo-status-page"
workers_dev = false
account_id = "CLOUDFLARE ACCOUNT ID"
type = "webpack"
webpack_config = "node_modules/flareact/webpack"


[triggers]
crons = ["*/2 * * * *"]

[site]
bucket = "out"
entry-point = "./"

[env.production]
workers_dev = false
kv-namespaces = [{binding="KV_STATUS_PAGE", id="THE KV ID", preview_id="THE KV ID"}]
zone_id="CLOUDFLARE ZONE ID"
route="https://status.mysite.com/*"
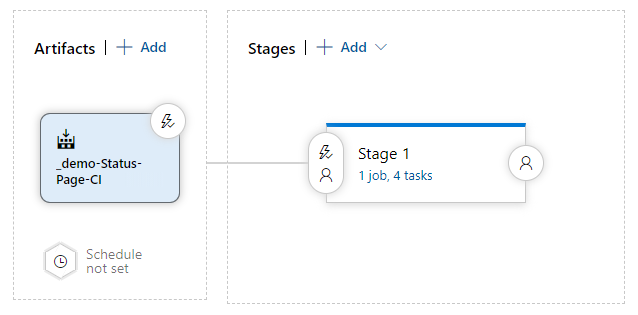
Setup the Build Pipeline
I usually have branch policies in place which require pull requests and a connected build to validate that the changes that have been made, don’t break anything 🙂
We need to make sure to request a Linux machine from our agent pool!

In detail we let the following steps happen:
- Install node > 14
- Install yarn
- Run yarn install and yarn build
- Copy all relevant files to the artifact staging directroy
- Publish the build artifacts
pool:
  name: Azure Pipelines
steps:
- task: UseNode@1
  displayName: 'Use Node 14.x'
  inputs:
    version: 14.x

- task: Npm@1
  displayName: 'npm custom'
  inputs:
    command: custom
    verbose: false
    customCommand: 'install -g yarn'

- powershell: 'yarn install && yarn build'
  displayName: Build

- task: CopyFiles@2
  displayName: 'Copy Files to: $(Build.ArtifactStagingDirectory)'
  inputs:
    Contents: |
     **
     !**/node_modules/**/*
     !**/.*/**/*
    TargetFolder: '$(Build.ArtifactStagingDirectory)'

- task: PublishBuildArtifacts@1
  displayName: 'Publish Artifact: drop'
Setup the Release Pipeline
As with the build pipeline, we need to make sure our agent is on a Linux machine for the release to work.
Our Release Pipeline is mostly straightforward:
- Install Node > 14.x
- Install Yarn
- Install @cloudflare/wrangler
- yarn install and yarn deploy –env production

There are some gotchas we need to pay attention to:
- We need to pass –env production to our yarn deploy, otherwise the [env.production] section in our wrangler.toml will be ignored
- We need to pass the CF_ACCOUNT_ID and the CF_API_TOKEN environment variables, so wrangler can pick them up.
steps:
- task: UseNode@1
  displayName: 'Use Node 14.x'
  inputs:
    version: 14.x
- task: Npm@1
  displayName: 'npm install yarn'
  inputs:
    command: custom
    verbose: false
    customCommand: 'install -g yarn'
- task: Npm@1
  displayName: 'npm install wrangler'
  inputs:
    command: custom
    verbose: false
    customCommand: 'install -g @cloudflare/wrangler'
- powershell: |
   yarn install
   yarn deploy --env production

  workingDirectory: '$(System.DefaultWorkingDirectory)/_demo-Status-Page-CI/drop'
  displayName: 'wrangler publish'
  env:
    CF_ACCOUNT_ID: xxxxxxx
    CF_API_TOKEN: xxxx
Final Steps
After the release pipeline deployed your worker successfully, we need to assign the freshly deployed worker to our route:

Voilá, your status page should be accessible from your configured CNAME/Route (may take a couple of minutes).


