


Azure Functions (v3): Response Caching
15. März 2021
Create Application user for Dynamics CRM 365
16. Juli 2021Introduction
Welcome to the first part of my PCF tutorial series. In this series I will walk you through the basics of PCF and show you how to setup a project, make some simple components and extend exisiting ones.
In this part I am going to guide you through installing and setting up your own PCF project, as well as show you some first steps. After that, I provide an overview of the manifest file and show you how you can build and upload your component as a solution into your MS CRM system.
Installation and Setup
- Install prerequisites:
- .Net Core https://dotnet.microsoft.com/download/dotnet-core/current
- Visual Studio Code https://code.visualstudio.com/download
- NPM https://www.npmjs.com/get-npm
- .Net Framework Developer Pack https://dotnet.microsoft.com/download/dotnet-framework/net462
- PowerApps CLI https://aka.ms/PowerAppsCLI
- Clone the repository for the project and open it up in your preferred IDE. We are going to use Visual Studio Code for this tutorial.
- Inside the repository execute the following commands in a terminal:
pac pcf init --namespace <specify your namespace here> --name <name of the code component> --template <component type>
npm install
First Steps
First, we are going to create a simple container element to display a given variable.
In index.ts we are creating a new private variable, which is a simple HTMLDivElement, at the top of our class:
private container: HTMLDivElement;
Next, we assign it the container parameter from our init method as well as assign the innerHTML of our container the raw sample property of our context parameters:
public init(context: ComponentFramework.Context<IInputs>, notifyOutputChanged () => void, state: ComponentFramework.Dictionary, container: HTMLDivElement) {
        this.container = container;
        this.container.innerHTML = context.parameters.sampleProperty.raw!;
}
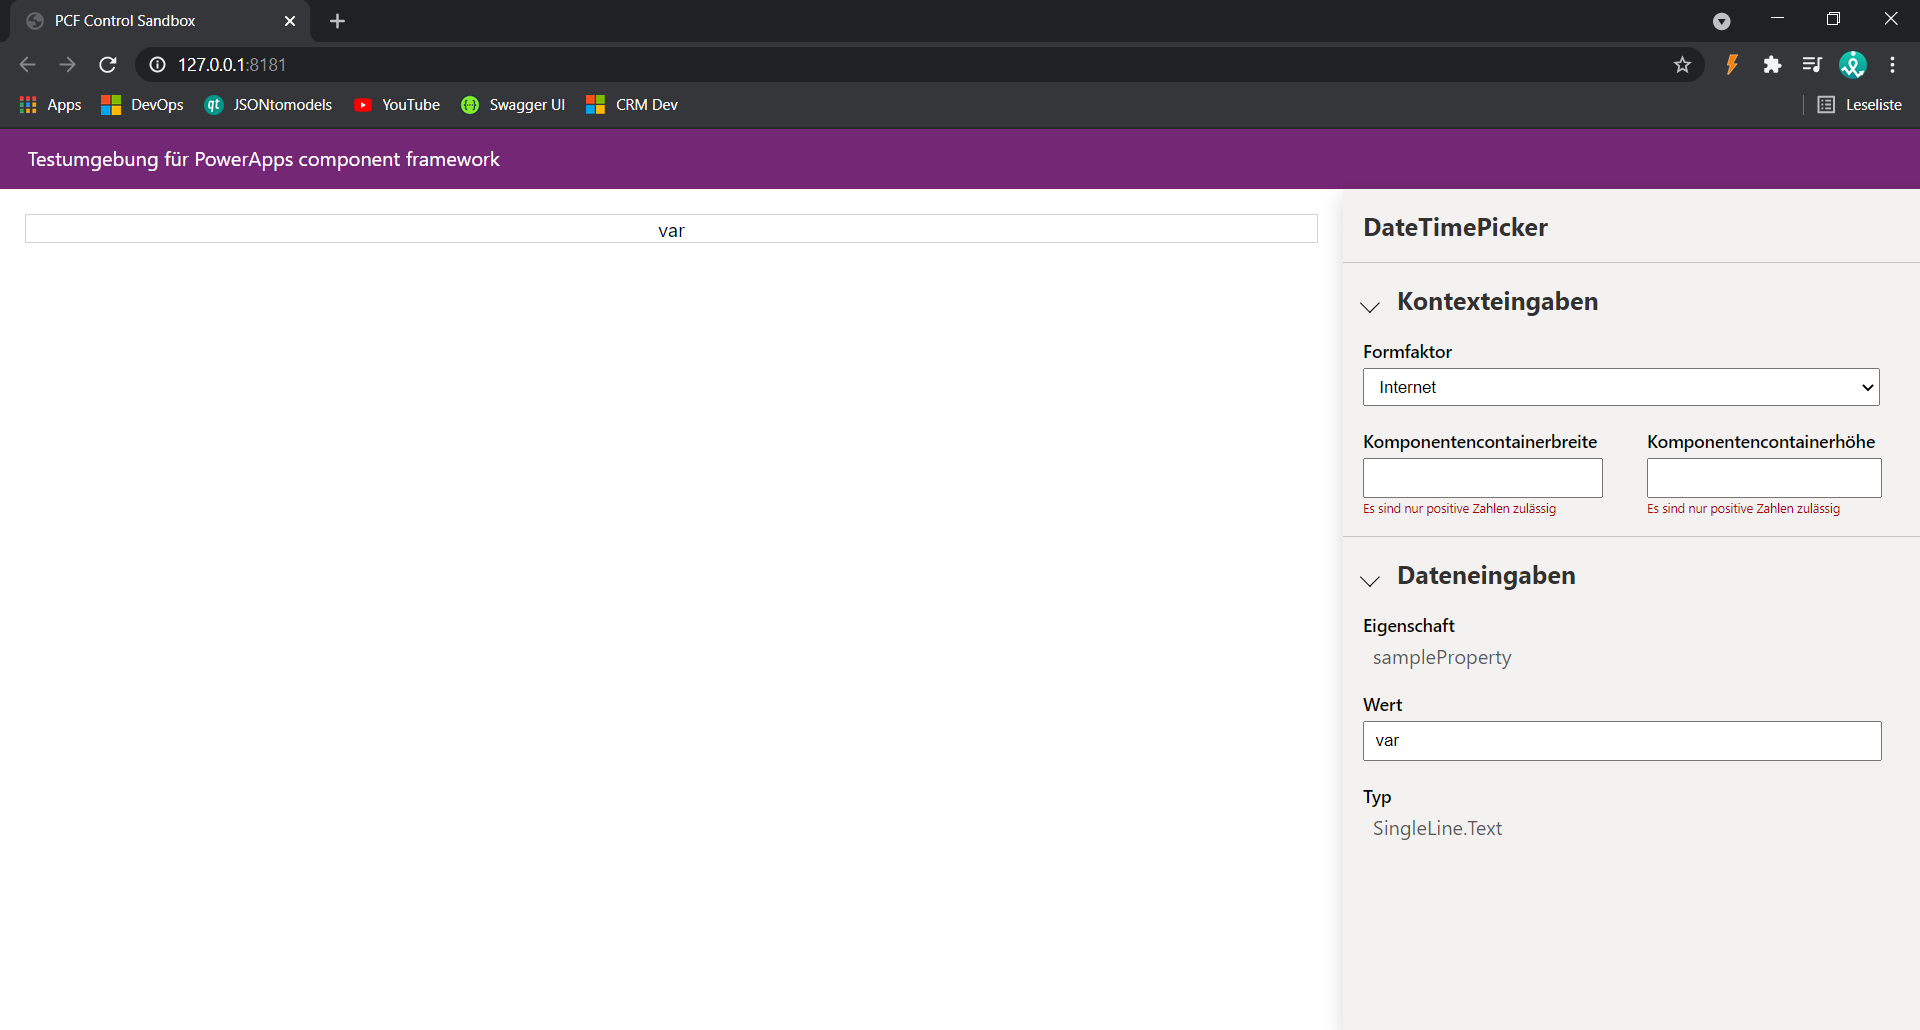
To view our current progress, we need to run npm start in our console and the following window will open in our browser if there are no errors:
In order to be able to update the variable in our browser, we also need to update the view in our updateView method:
public updateView(context: ComponentFramework.Context<IInputs>): void {
        this.container.innerHTML = context.parameters.sampleProperty.raw!;
}
To review our changes, we stop our npm start command with CTRL+C in our console and restart it.
The preview in our browser can be debugged with your favorite development tools, for example Google Chromes Debug Console, which can be opened by pressing F12 in Chrome.
Manifest
The code for the manifest is written in the ControlManifest.Input.xml file. In the <control> tag, there are attributes such as the namespace and the constructor, which are the namespace and name we gave our project during the setup process, a version number, a display-name-key and a description-key, which are the name and the description of the component that get displayed when adding a custom control in MS CRM, and a control-type.
The <properties> tag defines the field properties of the component and its attributes are name, which is the name of the property, display-name-key and description-key, which are the name and description that get displayed in MS CRM when modifying field properties. The of-type and of-type-group attributes define the types the field can be used with. Use of-type if there is only one type of an entity that can be used with the component, for example an option set, or use of-type-group, if there are multiple types, for example whole number and decimal number. The usage attribute defines if the user can interact with the field or if it is a read-only field. Required defines whether the field is required to fill out in MS CRM.
After adding a new property to the manifest, run npm run-script build in order to generate the needed TypeScript typings, so it can be used in the code.
The <resources> tag contains all the building blocks of the code: code, images, html, css and resx files.
If there are any specific feature APIs, such as audio, video or image capturing, needed, they can be activated inside the <feature-usage> tag.
Importing PCF Control into MS CRM
Firstly, we are going to create a folder for our solution and open a command line inside the folder.
In order to import our component into our MS CRM system, we need to run the following command to initialize and build the solution:
pac solution init --publisher-name <publisher-name> --publisher-prefix <publisher-prefix>
pac solution add-reference --path <path-to-component>
msbuild /t:build /restore
For msbuild you need to have Visual Studio installed. If msbuild is not in your path variable, you need to open the Developer Command Prompt for VS and navigate inside your solution folder and then run the mentioned command. This will create a .zip file in the bin/debug folder for your solution, that can then be imported into your CRM through the import solution prompt in your CRM system.
If you have troubles updating your solution in MS CRM, try deleting the component you want to update from your .cdsproj file, which sits inside your solution folder, make a clean build (msbuild /t:clean) of your solution and then build the solution as shown above again.
Sources
https://www.youtube.com/channel/UCjXCqDkRAGFAtu2JlWr3Epg/videos
https://community.dynamics.com/crm/b/crminthefield/posts/getting-started-with-pcf-controls
https://d365spartan.wordpress.com/2019/09/12/powerapps-component-framework-pcf-push/


